As I said at the end of the previous part, for the rest of the process, I prefer to use gmax. You can do all the gmax things I am going to talk about in Part 2 of this tutorial in Blender if you prefer.
In gmax, select file -> import, and select the .mdb file we exported at the end of the previous part. I've also open the Material Navigator pane so we can see the textures assigned. As you can see, Blender left an extraneous triangle object in there, we can select it and delete it.
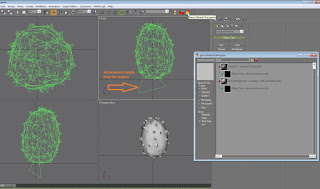
Remember from the past part where I said the model parts must be uniquely named, below is where you can do it in gmax, select the model (this model has only one part) and give it a unique name. Since the final object is going to be named PLC_var_food_02.mdb, I am going to name this model part PLC_var_food_02.
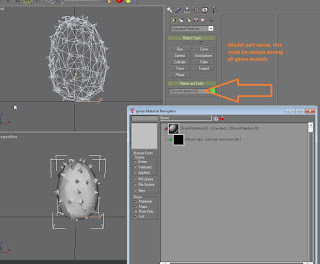
In the picture below, you can see I've named my model part, then used the Material Navigator to open the Material Editor pane. This pane is where we select the textures that will be applied to the model. Of the possible textures that can be applied, NWN2 can only use the Diffuse (this is the main texture), Self-Illumination (not needed, used if you want the object to glow), Filter (this is the tintmap), and Bump (this is the normal map). The rest are not used by the NWN2 game engine.
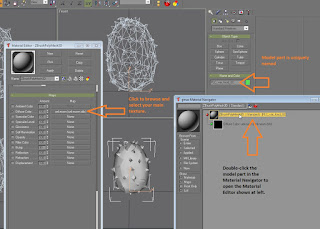
As we select the textures, the preview window shows them applied to the model. Your modelling program (whether gmax or Blender) knows how to wrap the texture around the object, as this information is included in the model file we downloaded. For purposes of this tutorial, no need to think about how it does it.
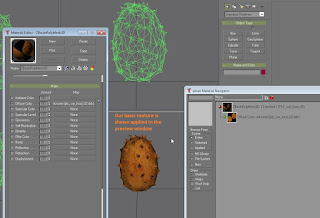
Note that how our Kiwano is oriented to the crossing lines in the viewports is how it's going to be centered ingame relative to the cursor when you try to place the object ingame. I'm not going to worry about that right now, let's just get the model ingame. Select File->Export and export it somewhere for the game to use and in the mdb format. I'm just using the Override folder here.
I've previously covered the 2da and blueprint editing process here: https://kamalpoe.blogspot.com/2016/02/nwn2-basic-placeable-reskinning-tutorial.html It's exactly the same. Once that's done, copy the new model and textures into an area the game will use. For this tutorial I am just using an empty override and a test module.
If you're already familiar with placeables, you might have realized I left out some things, don't worry, that's on purpose for this tutorial.
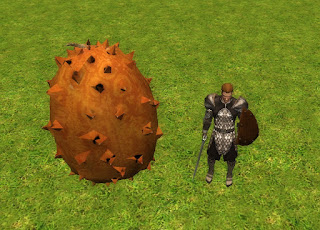
As you can see below, I've placed our kiwano ingame, with a stock human for scale. It's obviously way larger than I want, and also I can walk right through it! Let's fix that.
First, in the toolset, scale down your kiwano to the size you want it to actually be. Let's say 0.05, 0.05, 0.05 for our kiwano. Ok, now that it's the size you want your default kiwano to be, let's go back to gmax and make the kiwano that size.
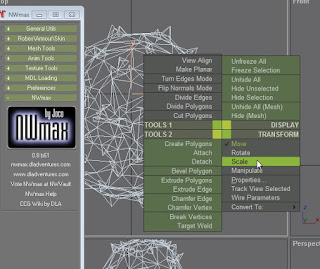
Right click on the object and select scale.
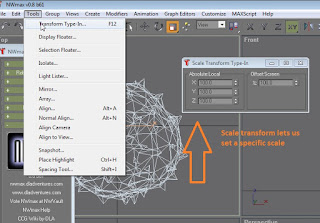
Next, select Tools ->Transformation type. Since you have already selected you are working with scale above, you get the Scale Transformation Type-In. While the NWN2 toolset uses a scale of 1 as default, gmax uses 100 as the default. So if you set your object in the toolset to 0.05 scale to get it scaled the way you want, you multiply that 0.05 times the 100 scale gmax uses, for a scale to enter in gmax of 5 for each dimension.
You can export your kiwano again, and when you place the object in NWN2 it should already be the size you want. But you can still walk through it.... Not really a problem for something meant to be a small fruit, but if you were putting a large statue ingame that's a problem.
Enter... the collision mesh. This is a model part that tells the game engine there is an object there, so creatures can't enter the space occupied by it. More about them is here: https://nwn2.fandom.com/wiki/MDB_Format Anyway, you need one, and I've put an example one here: https://www.dropbox.com/s/6z9bkdb66gy8yal/collision_mesh_for_tutorial.7z that you can download and use as an example. The example one is sized for a plate of pie. It's easier to import one than build a whole new one each time you need one.
You can also export a collision mesh from an existing object by opening the object in gmax, selecting the collision mesh, and then selecting File->Export Selected, this will export just what you've selected, not the entire object.
With your kiwano already open in gmax, select File -> Import and import your collision mesh. It doesn't replace the kiwano, just adds the new mesh object. Since my demo collision was from a pie, it's named based on that, change the name to the object you are working with, but it must have the _C3 or _C2 suffix (see the MDB documentation above for what the difference is). You need at least one of the two collision meshes.
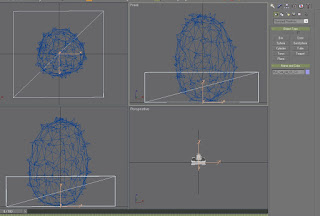
As you can see, it doesn't fit our kiwano very well, we need to fix that. Right click the collision box and select move, then select modify (under the arrow in the screenshot below) and the dots (highlighted in yellow below).
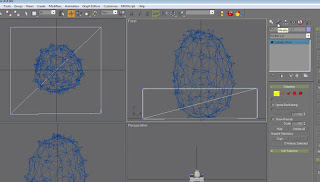
Select the dots in the viewbox, and move them around to better fir your object. Once you have a decent fit, you can export your object again and it's ready for game use. File->Export.
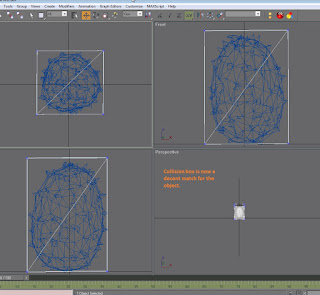
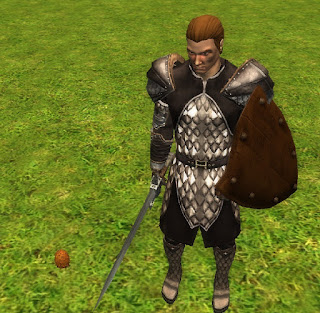
Our kiwano is small, too small to really affect the walmesh. What about larger objects? Part 3: adding a walkmesh.
No comments:
Post a Comment